Flutter Slivers: How Scrolling Works

This article covers how scrolling works, the differences between various scroll widgets, techniques for building efficient layouts with slivers, and common mistakes to avoid when working with lists.
Table of Contents
- Box and Sliver Protocols
- How Scroll Works
- When to use Slivers
- Structuring Sliver Widgets
- Common Mistakes
Box and Sliver Protocols
Flutter uses widgets to create elements, which in turn create render objects. Render objects are the core classes responsible for layout and painting on the screen.
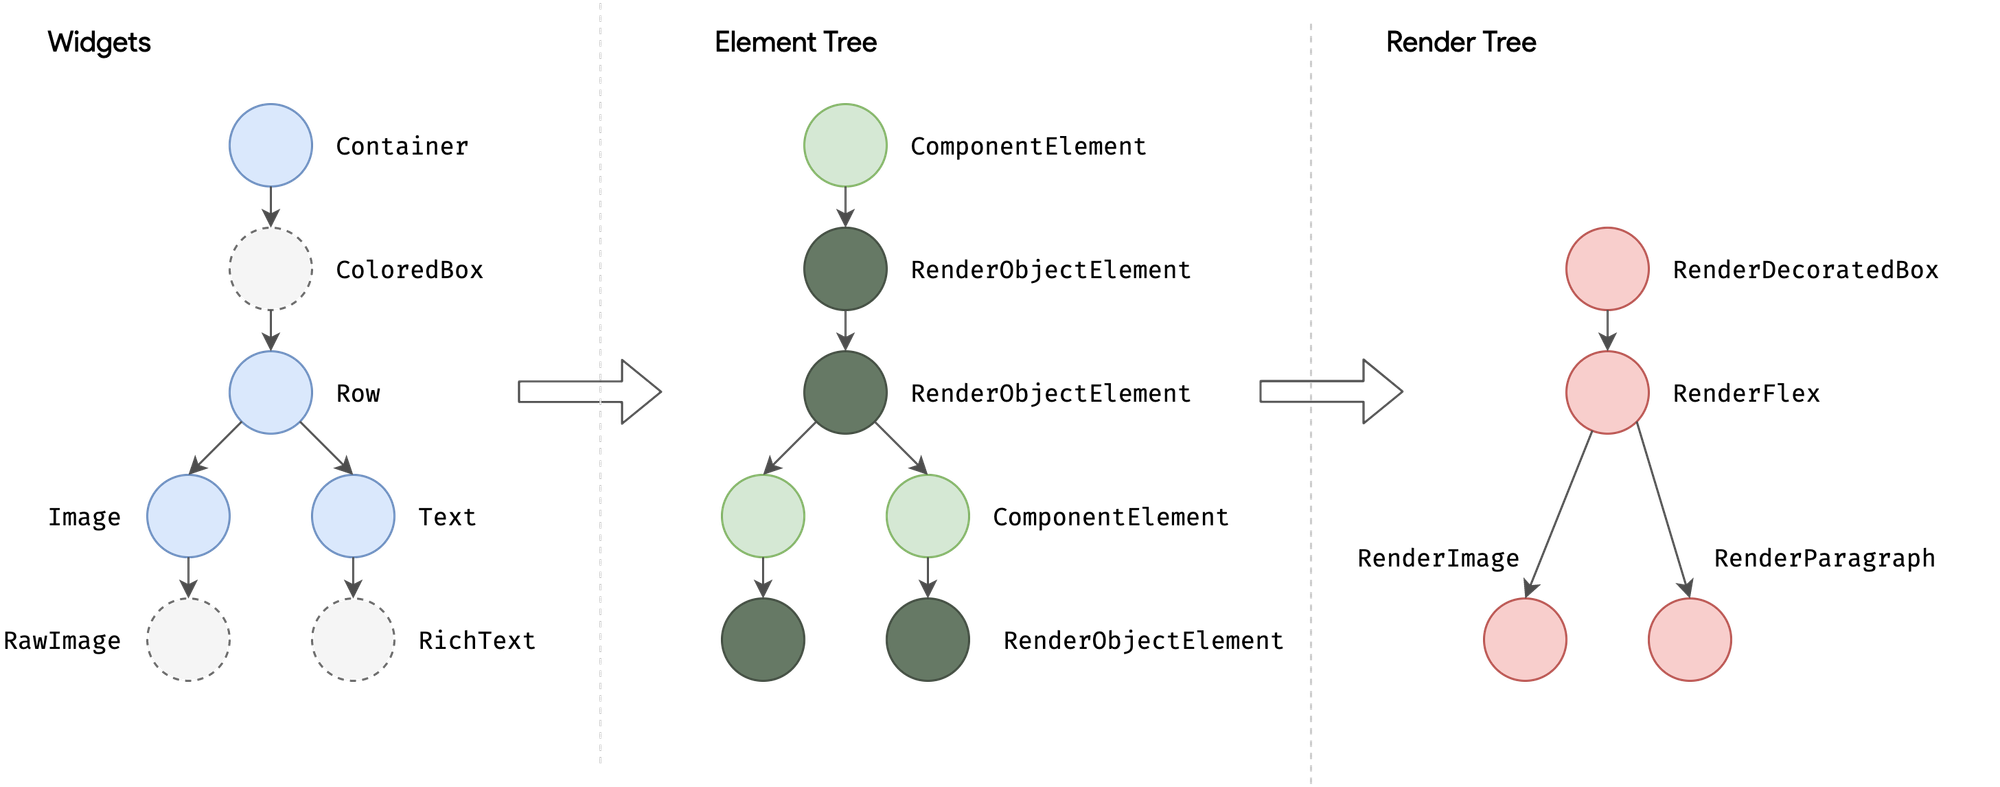
However, not every widget directly corresponds to a render object. Stateless and Stateful widgets serve as wrappers—they delegate layout and painting responsibilities to their child widgets.
Box Protocol
The box protocol is the most commonly used layout model in Flutter. When you create a column, a row, a decorated box, or an image, you are using box protocol. Box widgets use 2D Cartesian coordinate system (x and y, see Offset).
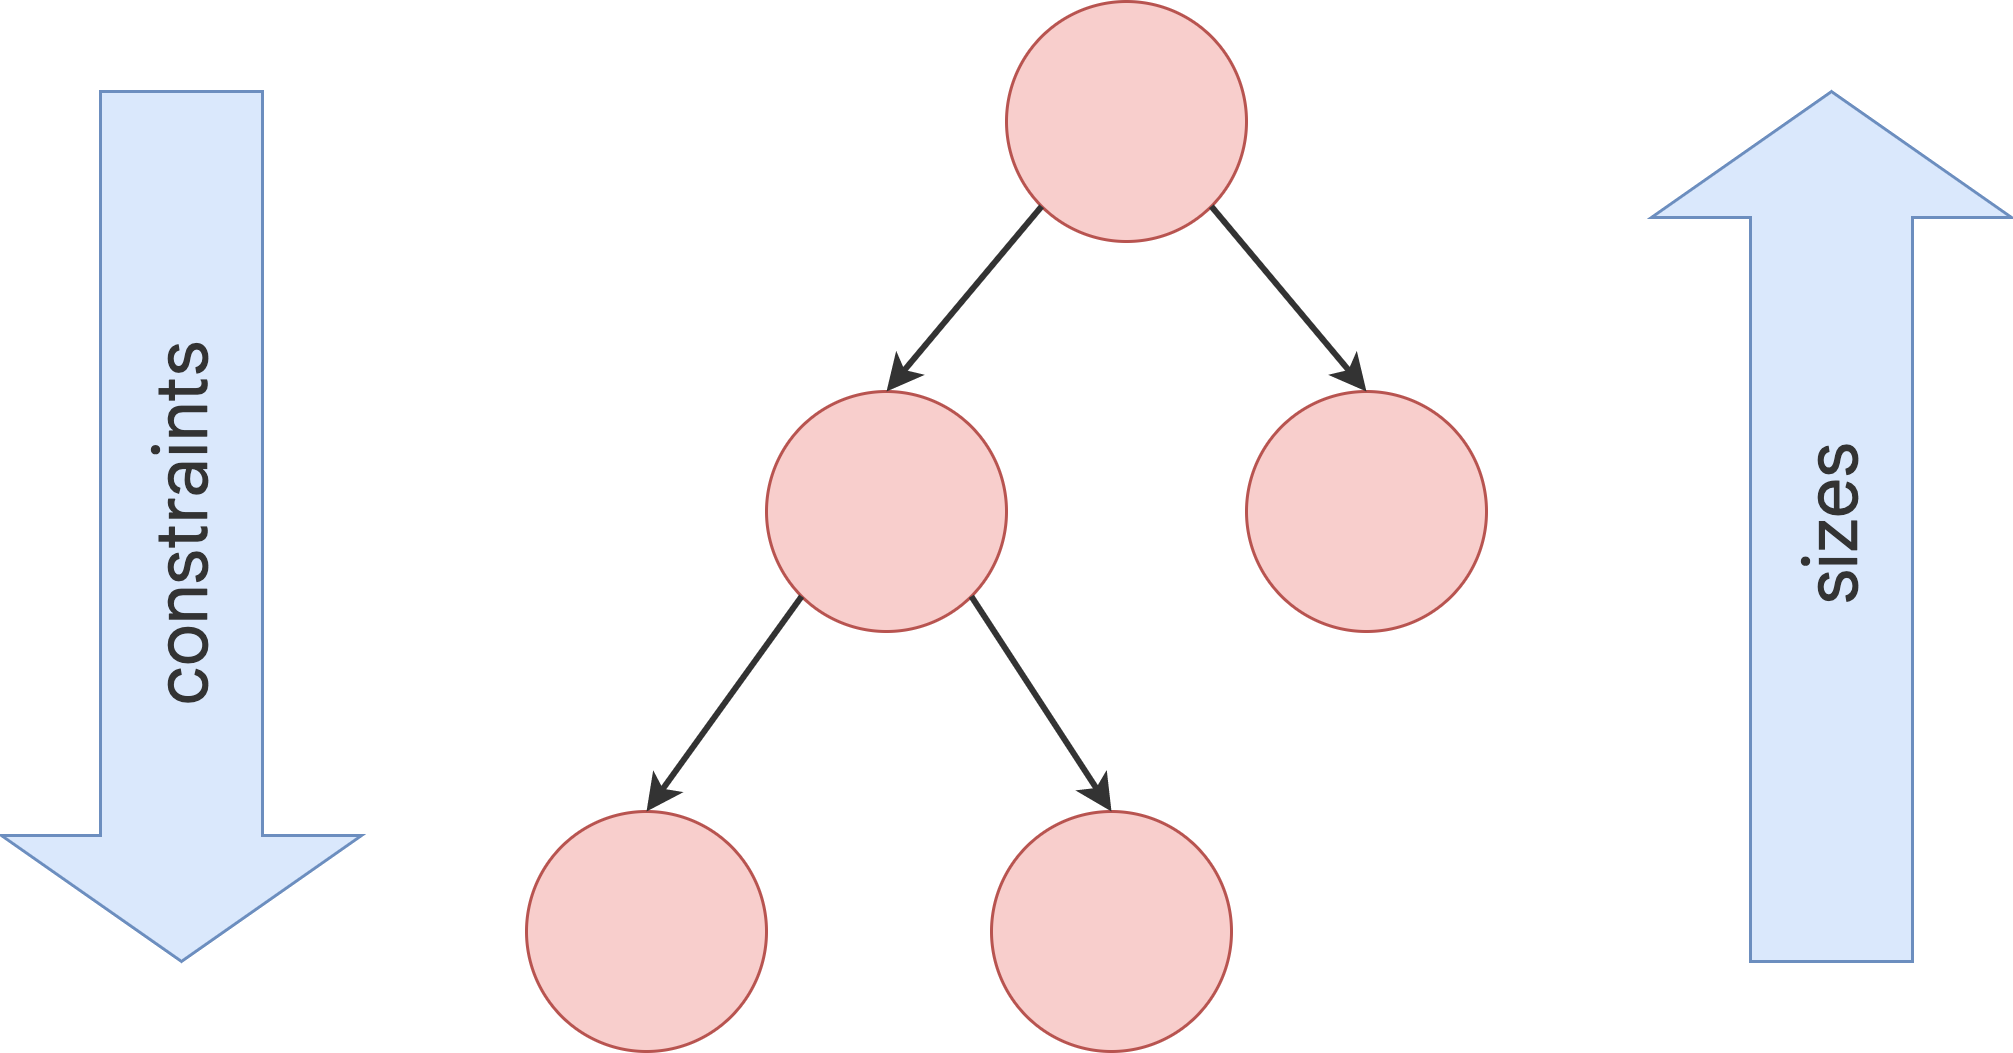
Box-based widgets use BoxConstraints, which define minimum and maximum width and height values. The layout process follows a simple rule:
Constraints go down, sizes go up, and the parent sets the child's position.

Imagine a widget tree Scaffold > Center > SizedBox > ColoredBox. During the layout phase, constraints flow from parent to child, and each widget determines its size. Here’s how the layout works for this widget tree, simplified:
Scaffoldreceives viewport constraints (400x800)- These constraints flow down to the
Center SizedBoxreturns its size (200x200)CenterpositionsSizedBoxat x:100, y:300
For more information about BoxConstraints, see Understanding constraints.
Sliver Protocol
Unlike the box protocol, the sliver protocol is designed specifically for scrolling layouts.
